Introduction
Art has always been a way to express emotions, and glass painting is one of the most unique forms of creativity. Unlike canvas or paper, glass gives a smooth and transparent surface that adds a magical effect to colors. Beginners often think glass painting is difficult, but the truth is – with the right tools, techniques, and a little patience, anyone can start. In this blog, we will discuss step by step basics of glass painting, materials you need, and tips to create your first artwork.
What is Glass Painting?
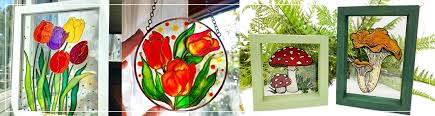
Glass painting is a technique where special paints are used on glass surfaces to create decorative designs. This technique is mostly used on windows, lamps, photo frames, and mirrors. The main beauty of glass painting is the glossy finish and the way light passes through colors, giving a stained-glass effect. It’s not just an art form but also a way to decorate your home in an elegant and budget-friendly way. This can also be a relaxing hobby for beginners.
Materials Required
Before you begin, make sure you have the right materials. You will need:
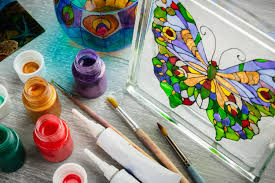
Glass surface (photo frame glass, bottle, jar, or mirror)
Glass paints (available in water-based or solvent-based)
Outliner/liner tube (black or golden, to define borders)
Brushes (thin and soft brushes for neat strokes)
Design sheet or tracing paper (to guide your design)
Palette and thinner (for mixing and cleaning)
Having the right materials makes the process smoother and ensures your painting lasts longer. Beginners should start with simple ready-made glass paint kits available online or in art stores.
Step-by-Step Process
Step 1: Clean the glass properly with soap and dry it to remove dust or fingerprints.
Step 2: Place your design under the glass (if transparent) or trace it using carbon paper.
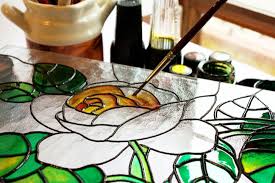
Step 3: Use the outliner tube to carefully draw borders on the design. Allow it to dry for 30–40 minutes.
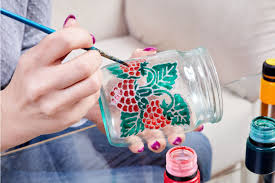
Step 4: Fill colors inside the borders using a soft brush. Always start with lighter shades first.
Step 5: Let the painting dry completely (usually 24 hours) before using or framing.
Here’s a tip – don’t overload the brush with paint, otherwise bubbles form, which spoil the finish.
Tips for Beginners
Always start with simple floral or geometric designs before moving to complex ones.
Keep your hand steady while outlining, because the outline decides the final look.
If you make a mistake, use a cotton swab with thinner to clean.
Experiment with transparent vs opaque paints to see which suits your style.
Patience is key – avoid touching the painting while it’s drying.
With practice, your strokes will improve and colors will blend more smoothly.
Benefits of Glass Painting
Glass painting is not only about creating art, but also about mental relaxation. It helps reduce stress and improves concentration. Many people adopt it as a hobby, and some even sell their handmade glass artworks online. This makes it both a creative and profitable skill. Gifting a hand-painted glass item also adds a personal touch and feels more special than store-bought products.
Conclusion
In the beginning, glass painting may feel challenging, but once you practice, it becomes an enjoyable journey. Remember, every expert artist was a beginner. So don’t worry about perfection – enjoy the process, experiment with designs, and slowly build your style. Whether you create a simple flower on a glass jar or a detailed pattern on a mirror, each piece will reflect your creativity. Start today, and let your imagination shine through glass.